New to growing your own tomatoes? This is the forum to learn the successful techniques used by seasoned tomato growers. Questions are welcome, too.
|
 |
|
|
Thread Tools | Display Modes |
 February 12, 2013
|
#1 |
|
Tomatovillian
Join Date: Aug 2010
Location: Miami, FL.
Posts: 442
|
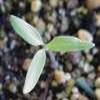
There are a lot of ways to start seeds. Some use multi cell packs and one or two seeds per cell. Some use small paper cups and one to 3 seeds per cup. Many use a bulk starting method with a larger pot and transplant sprouts. I will use a 4 X 4 pot and place 9 seeds evenly spaced and transplant sprouts. I take a split fruit and squeeze the contents into a 6" pot and cover with soil. It takes longer to sprout, but it gets the healthiest sprouts. I don't even consider using wet paper towels in ziplocs. There must be other methods.
 
Last edited by Garf; February 12, 2013 at 03:28 PM. Reason: add pics |

|

|
|
February 12, 2013
|
#2 | |
|
Tomatovillian
Join Date: Aug 2011
Location: Plantation, Florida zone 10
Posts: 9,283
|
Quote:
Is that helpful? Marsha |
|
|
|
|
|
February 15, 2013
|
#3 |
|
Tomatovillian
Join Date: Sep 2012
Location: SW FL
Posts: 152
|
I tried Craig's dense planting method once this past winter with a half dozen varieties of tomato and had so many seedlings I had to beg people to take the plants! (Okay, ALMOST had to beg, LOL) This is a great method if you need/want a lot of plants.
My favorite method, however, is to plant 2-4 seeds per 4 oz container (applesauce - that I've made into a tiny wicking container) and transplant the sprouts as deep as I can when they had their second true leaves. I like this method best as I have a controllable number of seedlings since I haven't that much space. (And I have an almost endless number of these containers.) Once transplanted deep (into empty water/soda bottles that have a wick in them also), the plants have all developed really nice strong stems and taken off. This past winter has shown that I'll have very healthy tomato plants ready to plant out in 4 weeks from sowing. As I'm pretty new to this, I THINK this is good as it seems nice to have a target date for planting out when sowing seeds. (Is this timing good?) |
|
|
|
|
February 15, 2013
|
#4 |
|
Tomatovillian
Join Date: Apr 2010
Location: Sacramento, California
Posts: 267
|
This year Im putting one seed on a camp cotton ball in its own little baggy and placed on a heat mat. Lots of sprouts so far.
|
|
|
|
|
February 15, 2013
|
#5 | |
|
Tomatovillian
Join Date: Feb 2012
Location: Hampton, VA
Posts: 86
|
Quote:
|
|
|
|
|
|
February 15, 2013
|
#6 | |
|
Tomatovillian
Join Date: Sep 2012
Location: SW FL
Posts: 152
|
Quote:
FreyaFL Last edited by FreyaFL; February 15, 2013 at 11:03 AM. Reason: typo |
|
|
|
|
|
February 15, 2013
|
#7 | |
|
Tomatovillian
Join Date: Sep 2012
Location: SW FL
Posts: 152
|
Quote:
|
|
|
|
|
|
February 15, 2013
|
#8 | |
|
Tomatovillian
Join Date: Aug 2011
Location: Plantation, Florida zone 10
Posts: 9,283
|
Quote:
|
|
|
|
|
|
February 15, 2013
|
#9 | |
|
Tomatovillian
Join Date: Feb 2012
Location: Hampton, VA
Posts: 86
|
Quote:
|
|
|
|
|
|
February 15, 2013
|
#10 |
|
Tomatovillian

Join Date: Sep 2012
Location: Oklahoma
Posts: 4,488
|
I have mentioned it before, but I guess it wouldn't hurt to mention it again. Home made paper pots! They are free and self wicking by nature, and 100% biodegradable! It is even less stressful to the plants once you transplant them into the garden! And by the time you cut an X in the bottom of a cup and cut a strip of cloth pull it through and fill with water, you could have made 5 paper pots!
 I use the "can method", because I am REALLY a cheapskate! Making paper pots But anyone who wants to be fancy about it they make kits. In England and Europe: Nether Wallop - Paper Potters. Set of Two In USA and North America: Potmaker
__________________
Scott AKA The Redbaron "Permaculture is a philosophy of working with, rather than against nature; of protracted & thoughtful observation rather than protracted & thoughtless labour; & of looking at plants & animals in all their functions, rather than treating any area as a single-product system." Bill Mollison co-founder of permaculture Last edited by Redbaron; February 15, 2013 at 12:30 PM. |
|
|
|
|
February 15, 2013
|
#11 |
|
Tomatovillian
Join Date: Sep 2012
Location: SW FL
Posts: 152
|
Scott, I do like the paper pots and have used them (especially if I plan to start seeds of plants that dislike being moved.) My problem, and why I started with all this wicking stuff, is that I often forget to water (or I'm in a mood...
 ...or I ask one of my kids to cover for me when I'm unable to water for some reason.) Depending on how much water the reservoir holds and various weather conditions, I don't have to water at all after sowing and before transplanting to individual planters. I'm a lazy gardener. ...or I ask one of my kids to cover for me when I'm unable to water for some reason.) Depending on how much water the reservoir holds and various weather conditions, I don't have to water at all after sowing and before transplanting to individual planters. I'm a lazy gardener.
|
|
|
|
|
February 15, 2013
|
#12 |
|
Tomatovillian
Join Date: Dec 2011
Location: Central Florida
Posts: 377
|
I start tomato, pepper and eggplant seeds using coir and empty toilet paper spindles that I've cut in half then reinforced with scotch tape. Then I place four of these little pots in an empty CD cake box and put it on my TV cable box for bottom heat. After they get their first set of true leaves I pot them up into 3" peat pots using potting soil or seed starting mix. When I transplant them to the garden I tear away the peat pots leaving the root balls undisturbed.
__________________
Jerry - You only get old if you're lucky. |
|
|
|
|
February 15, 2013
|
#13 |
|
Tomatovillian

Join Date: Nov 2012
Location: NJ, zone 7
Posts: 3,162
|
Hi, Freya,
how long do you keep your tomatoes in the paper cups? Until planting them? I put my seeds into a see-through 20 oz plastic cups that are half full with soil and add soil as they grow bigger up to the top and than plant them, which is about 8 weeks since seeding. Would paper cups hold that long? The eggplants takes even longer. thanks for great ideas
__________________
Ella God comes along and says, "I think I'm going to create THE tomato!
|
|
|
|
|
February 15, 2013
|
#14 | |
|
Tomatovillian
Join Date: Sep 2012
Location: SW FL
Posts: 152
|
Quote:
Interestingly, I've found that putting the small seedlings into the 16-20 oz bottles and letting them grow out there for a couple weeks actually makes for stronger, quicker to produce plants. Ones that I've planted directly into a larger spot seem to take longer. In an accidental comparison, I had ripe fruit on one that had been in the small bottles 2-3 weeks earlier than it's sibling that went directly into its 5 gallon bucket. (Both were in 5 gal buckets eventually.) NOTE: The timing on my seedlings was only for tomatoes. Peppers take A LOT longer and eggplant...  ...I think my eggplant seeds took over a month to germinate. ...I think my eggplant seeds took over a month to germinate.
|
|
|
|
|
|
February 17, 2013
|
#15 |
|
Tomatovillian
Join Date: Aug 2010
Location: Miami, FL.
Posts: 442
|
I use these for bulk seed starting. Then I reuse them for larger seedlings.
|
|
|
|
|
| Thread Tools | |
| Display Modes | |
|
|


 View Public Profile
 Find More Posts by Garf
 Visit Redbaron's homepage!

 Linear Mode

