Discussion forum for the various methods and structures used for getting an early start on your growing season, extending it for several weeks or even year 'round.
|
 |
|
|
Thread Tools | Display Modes |
 January 20, 2012
|
#1 |
|
Tomatovillian

Join Date: Jul 2010
Location: Reno
Posts: 89
|
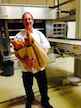
We have come up with another idea for the greenhouse (85% finished) I have a raised permanent planting bed 36 inches by 15 feet. We use leftover ICF building panels, cut their support off and bolt a ¾ inch exterior plywood to the remaining supports every 18 inches this gives us 2.5 inches of insulation all around the box. We then used the same plywood covered the outside and braced the four corners with simpson's metal braces. It sits on 12 inches of gravel 12 inches under the finish level. The footings wall is made of ICF forms 24 inches tall and they are 2 feet underground. They are filled with 6 inches of concrete. This will keep the outside frost from ever penetrating the planting beds. The other morning it was 5°and the soil temperature 9 inches down stayed the same. Since we are reskinning the hoop house and had a 12X20 piece of solar pool cover I designed the 1/2 inch PVC frame. We then covered it with the solar pool cover zip tying it to the frame. They sit it on the top trim of the beds. The top 4 inches of planting soil only lost 7° overnight. The greenhouse heater keeps it above 35°and under the covers it was a minimum of 48°. They are very portable. Best of all by using my 4 year old pool cover they each costs $4.00 and! It will be fun experimenting with them.
Joan from Reno where we finally got some moisture! 
|

|

|
|
January 21, 2012
|
#2 |
|
Tomatovillian
Join Date: Jan 2009
Location: selmer, tn
Posts: 2,944
|
verrry nice. jon
|
|
|
|
|
January 21, 2012
|
#3 |
|
Tomatoville® Moderator
Join Date: Jan 2006
Location: San Antonio, Texas
Posts: 4,386
|
Great idea! Thanks for posting this.
__________________
Michael |
|
|
|
|
January 21, 2012
|
#4 |
|
Tomatovillian

Join Date: Jan 2006
Location: Northern Minnesota - zone 3
Posts: 3,220
|
Very clever! Sort of like working with giant tinker-toys (do kids still have them these days?) I love how you can put plumbing pieces together in creative ways.
__________________
Dee ************** |
|
|
|
|
January 21, 2012
|
#5 |
|
Tomatovillian

Join Date: Feb 2006
Location: Den of Drunken Fools
Posts: 38,539
|
Looks Nice.
this is a little late for you and I dont know if you knew they had these or not. I will post the link anyway. They are called PVC 3 way fittings. http://www.google.com/aclk?sa=l&ai=C...corner+fitting QWorth |
|
|
|
|
January 21, 2012
|
#6 |
|
Tomatovillian

Join Date: Jan 2007
Location: Southwestern Ontario, Canada
Posts: 4,521
|
Looking very good there, Joan. Wish I had the space to try something like that.
Zana |
|
|
|
|
January 21, 2012
|
#7 |
|
Tomatovillian
Join Date: Jul 2010
Location: Reno
Posts: 89
|
Hi Worth
I looked at the 3-way but they only come in ¾ inch or larger. It would have doubled the price and made it much heavier than necessary. Cheap,Cheap, cheap. Most everything was recycled except for siding, trim and insulation. 
|
|
|
|
|
January 21, 2012
|
#8 | |
|
Tomatovillian
Join Date: Feb 2006
Location: Den of Drunken Fools
Posts: 38,539
|
Quote:
 worth |
|
|
|
|
|
January 23, 2012
|
#9 |
|
Tomatovillian
Join Date: Jan 2007
Location: PNW
Posts: 4,743
|
I take it ICF refers to "insulating concrete forms":
http://en.wikipedia.org/wiki/Insulating_concrete_form
__________________
-- alias |
|
|
|
|
January 26, 2012
|
#10 |
|
Tomatovillian
Join Date: Jan 2011
Location: CT Zone 5
Posts: 186
|
So why can't you keep the lights under the plastic to add more warmth to the growing beds? You'll also get more light to the plants. Very nice project. Will be retrofitting my low/grow tunnels as soon as I feel up to it. Thanks for the pics too!
|
|
|
|
|
January 26, 2012
|
#11 |
|
Tomatovillian
Join Date: Jul 2010
Location: Reno
Posts: 89
|
Thanks for the compliment, they're working out great. I use these to cover my winter crops, and they are only 14 inches high, plus my light fixtures are longer than each section and even if they did fit under them it would necessitate cutting holes in the bubble wrap on top which would eliminate our removing them during the day. Inside the forms it has been staying 14°warmer than the rest of the greenhouse. We live in Reno Nevada where we have sunshine or partial sunshine 315 days a year. So we take the covers off almost every day, the exception being if it is really cold and the wind is is gusting between 45 and 70. That cools the greenhouse quite a bit. In my hoophouse we have used low tunnels quite successfully, we just drilled into the top of the frame and used PVC across the beds and draped greenhouse film over them so that we could raise them to water the plants etc. It is not safe to use a drip irrigation system until the end of April because of freezes. Last year our last freeze was June 12. :-) Joan
|
|
|
|
|
January 27, 2012
|
#12 |
|
Tomatovillian
Join Date: Nov 2011
Location: newport beach
Posts: 5
|
Looks good! Keep it up!!

|
|
|
|
|
January 27, 2012
|
#13 |
|
Tomatovillian
Join Date: Jan 2011
Location: S.E. Wisconsin Zone 5b
Posts: 1,831
|
Excellent invention, Joan. May I use your design when I get my new hoophouse up?
Dutch |
|
|
|
|
January 27, 2012
|
#14 |
|
Tomatovillian
Join Date: Jul 2010
Location: Reno
Posts: 89
|
Thanks for the compliment, but I am sure there are others that have built similar mini greenhouses. It is really working well, and although it has not been really cold lately, the plants are thriving with their winter coats on
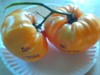
 When we first filled the planting beds we watered them down with warm water. Because they are insulated on the two sides they have not returned to the cold-frozen planting mix that we put in. We're just about ready to harvest some lettuce that I started earlier. Surprisingly the cilantro is doing just fine. I wasn't sure how it would do. Joan |
|
|
|
|
|
|


 View Public Profile
 Find More Posts by POAJoan
 Linear Mode

