 February 5, 2012
|
#91 | |
|
Tomatovillian

Join Date: Apr 2007
Location: Campbell, CA
Posts: 4,064
|
Quote:
Yes the Iditarod Red has flowered, both on the indoor as well as the newly planted outdoor plants.  No fruitset yet, but both the plants do have a hearty Alaskan heritage.  Raybo |
|

|

|
|
February 5, 2012
|
#92 |
|
Tomatovillian

Join Date: Jun 2011
Location: Eastern Suburb of Sacramento, CA
Posts: 1,313
|
Ray, I think you'll get more robust seedlings using the T5 lamps over ambient window light. I'd say you've already got a couple weeks or three head start on those tomatoes plants. They look great. I like the application specificity of those dedicated grow fixtures/lights, but they always seem overpriced surpassing. Therefore, I turn to the standard T5 shop light options at H.D. They run $80, but you get ~216W of high-output florescent luminescence from them, which is a lot. You do have to wire up the ballast, which is a pain and potentially dangerous.
I'll try not to worry about the green algae. You know my soil mix should have matched yours 100% save for the castings, which are supposed to be fairly benign if not benevolent towards the plants. The dropped branches aren't your standard, aging old leafs. No, this is the mischief of some fungus I'm afraid. I just hope I've caught it before it takes down the farm. I've noticed an increase in blossom drop since it's inception. I'm loosing new blossoms now, as well as old: probably about 25 today alone. Somehow, these plants are stressed and miserable. I'm loosing faith in them, but I'll see them to their final graves like a loving father to his plagued brood of pre- Renaissance children. --naysen |
|
|
|
|
February 6, 2012
|
#93 |
|
Tomatovillian
Join Date: Apr 2007
Location: Campbell, CA
Posts: 4,064
|
Naysen,
I had considered rigging up my own lighting system, but with the setup to suspend the light, etc. it was more cost effective to buy the HydroFarm T5 lights. The built-in height adjustment is really cool. And the 24 Watt 6400 degree Kelvin bulb seems ideal, from a power consumption standpoint. For your 55 plug tray, a single 2 foot setup would work. $50.00 including free shipping (no Tax) at Amazon.com. http://www.amazon.com/Hydrofarm-2-Fo...8504281&sr=8-1 Raybo 
|
|
|
|
|
February 6, 2012
|
#94 |
|
Tomatovillian
Join Date: Sep 2011
Location: Parma, Ohio (6a)
Posts: 299
|
I'm glad to hear you have good results with the jump start light cause thats exactly what I bought a couple months ago!
In a few days I can start onion and head lettuce seed.... can't wait! |
|
|
|
|
February 6, 2012
|
#95 |
|
Tomatovillian
Join Date: Jun 2011
Location: Eastern Suburb of Sacramento, CA
Posts: 1,313
|
Ray, that's a decent price you've found, especially when including shipping. Unfortunately, it's only 2 feet across and one lamp, which will be woefully insufficient when I have a 100+ six inch pots to illuminate. For around $100 (cost of 4' 4-lamp T5 plus $25 amortized portion of a Lowes rack on sale), I can get a setup that has eight times the light output and wider rack base. Yes, I also had to throw in an extra $14 or so on the rope ratchets to simplify lowering/raising the light fixture. So, I'm paying a bit over twice as much for eight times the lighting (we will not mention the 8x power bills). I do agree that the HydroFarm setup would be perfect for my plug-pad, but I need to think the full game. Those plants will want to pot up before they go out.
-naysen |
|
|
|
|
February 6, 2012
|
#96 |
|
Tomatovillian
Join Date: Apr 2007
Location: Campbell, CA
Posts: 4,064
|
Naysen,
I realize that you have already gone down the path of your own assembled lighting system, but for others who may be reading this Thread, Amazon sells the 4 foot long HydroFarm "Jump Start" T5 lighting system for only $10.00 more ($59.99). http://www.amazon.com/Hydrofarm-4-Fo...8549524&sr=8-2 Frankly, 2 of these 4 foot lights were my first choice, but when I measured the only available table which would fit into my very tight space, the 52 inch length of the support legs were too long for my 44 inch table.  So, my only choice was a ganged 2 foot lamp arrangement to fit onto my table. Others certainly shouldn't have my space constraint, so two of the 4 footers at $120.00 including shipping (and no Tax) would seem to be the best option, if folks want the real-deal T5 6400 degree Kelvin adjustable lighting setup.  Raybo |
|
|
|
|
February 10, 2012
|
#97 |
|
Tomatovillian
Join Date: Feb 2012
Location: Wisconsin
Posts: 7
|
Raybo,
Thanks for all your work on this and sharing it all for free. We are building our first InnTainer using your plans. Using the 18 gallons tote, for Step 8, you use the measurement of 4 1/4", but according to the picture you are making the cut right at the rib transition point - which measures about 4 5/8" on the Roughnecks we just purchase. We are going to go with your measurement as that seems to be correct with the rest of the construction. Just thought it might be worthwhile to point out that other might have the same confusion. Thanks again. We are looking forward to trying to get tomatoes to grow in our greenhouse better than we have before. Mary and Eric |
|
|
|
|
February 10, 2012
|
#98 |
|
Tomatovillian
Join Date: Apr 2007
Location: Campbell, CA
Posts: 4,064
|
migraz,
Thanks for alerting me on this error. I've measured mine and it is approx 4-1/2 inches from the rim. I will change the Guide accordingly. The key thing is to make the cut such that the "feet" remain on the support piece - not the upper aeration container. I am also modifying the wicking cut-out to 3 inches diameter, as the former 3-5/8" was a carryover from the EarthTainer. Also, I recommend 2 Cups of Dolomite Lime; and I've removed reference to the optional Epsom Salts additive. The new Guide will be published on the TomatoFest site early next week - - but I wanted to get this info out to you right away. Raybo 
|
|
|
|
|
February 10, 2012
|
#99 |
|
Tomatovillian
Join Date: Feb 2012
Location: Wisconsin
Posts: 7
|
Thanks Raybo - we apparently did it wrong then as we cut at 4 1/4 which was above the rib transition. Hopefully it will all still work ok. Also we used the 3 5/8" hole.
|
|
|
|
|
February 10, 2012
|
#100 |
|
Tomatovillian
Join Date: Apr 2007
Location: Campbell, CA
Posts: 4,064
|
No worries on either.
I am always trying to learn from year to year, and make evolutionary (not revolutionary) tweaks to the design. Raybo |
|
|
|
|
February 11, 2012
|
#101 |
|
Tomatovillian
Join Date: Feb 2012
Location: Wisconsin
Posts: 7
|
Raybo,
Speaking as a retired technology and engineering teacher who had to write instructions for hundreds of student activities, you have done an excellent job in these instructions. The design itself is excellent and I love that wastes so little. If you think it is best to cut and leave the "feet" would it perhaps be good to have people cut right at the intersection line rather than measure from the lip? I imagine that there can be some variation in some measurement with these tubs and maybe using the line already mostly there would be easier to see and mark? Also, for people who have them around, I found that tin snips worked quite well for the second cut around the tub, easier than my sabre saw on that one. I didn't have a large enough hole saw for the largest hole. Rather than buy one, I used my Dremel tool with the spiral cutting blade and the circle cutting tool that came with it and it worked perfectly too. So you have made a design that not only makes great use of material and grows wonderful plants, that also can be constructed with a variety of tools, minimizing the need for people to buy many new ones. Eric |
|
|
|
|
February 11, 2012
|
#102 |
|
Tomatovillian
Join Date: Jun 2011
Location: Eastern Suburb of Sacramento, CA
Posts: 1,313
|
My latest posted here (w/ Pics):
http://www.tomatoville.com/showthrea...479#post254479 Expect to see Ray's update soon. -naysen |
|
|
|
|
February 11, 2012
|
#103 |
|
Tomatovillian
Join Date: Apr 2007
Location: Campbell, CA
Posts: 4,064
|
Eric - Thanks for the kind words. Constructing these D.I.Y. projects is fun. Kind of takes me back to the days of building things with my ole Erector Set (if you remember back in the day..)
For the weekly update - Feb 11. Plants continue to mature:  I've had to top the Mountain Princess on two stems this week as they were hitting the ceiling:  BTW, that is Stakeless in the foreground. I've had first ripe fruit on Mt. Princess this week:  And Mano isn't far behind:  Picked my second fruit from Victorian Dwarf:  Have to admit, this variety is a bit on the tart side.  The Rosella Purple fruit is about grape size as of today:  And I have now discovered 2 pea size fruitset hiding in the Iditarod Red plant: 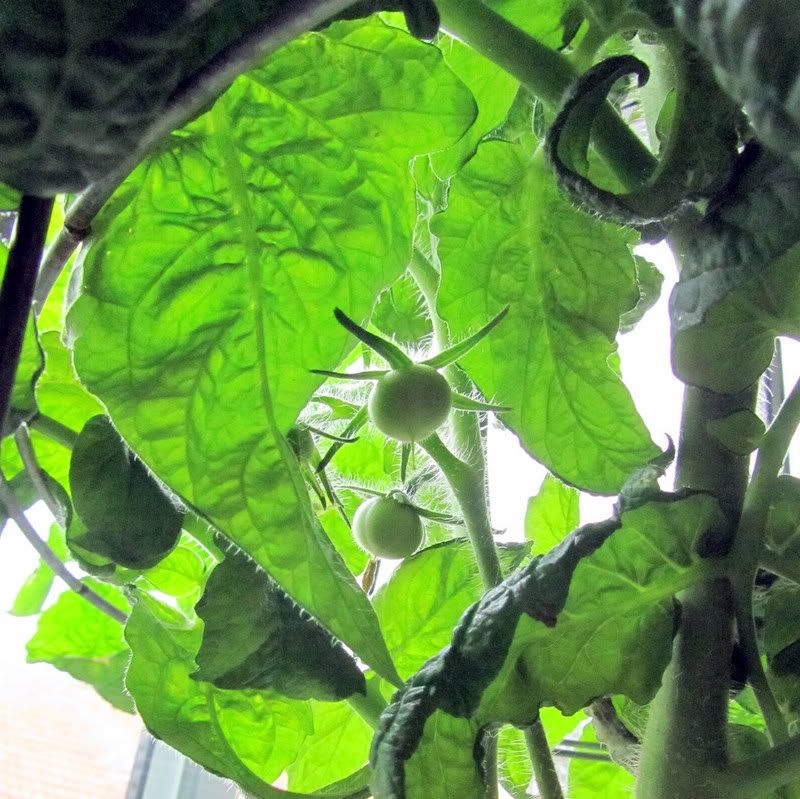 The Rosella Purple plant now measures 40 inches tall, while the Iditarod Red is standing 36 inches in height. Very thick stem development on the Iditarod Red plant: 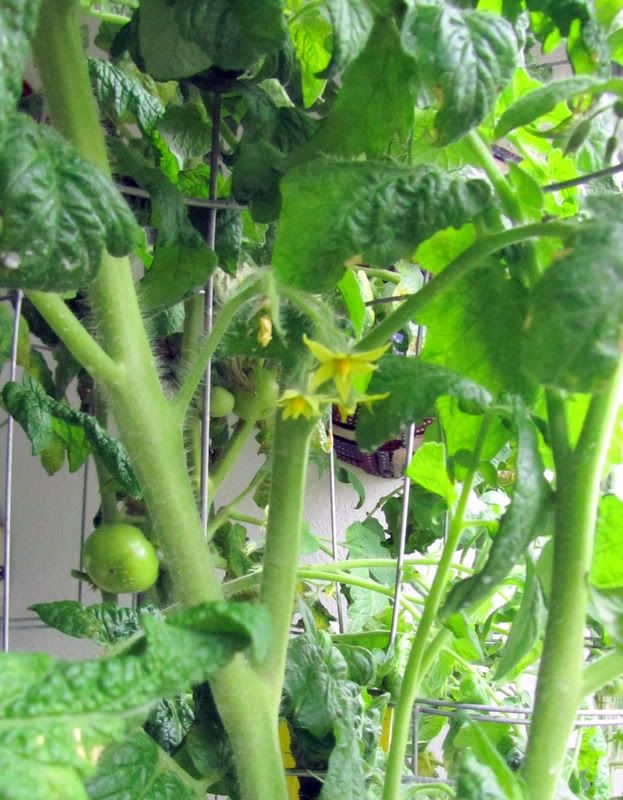 I am now having to prune the lower branches on several of the plants as they are turning yellow, with some sort of fungal issue, similar to what Naysen has reported. I really don't want to spray a Fungicide in the house, so I'll just hope the fruit develop faster than the spread of the fungal issue.  Raybo
Last edited by rnewste; February 11, 2012 at 06:25 PM. |
|
|
|
|
February 14, 2012
|
#104 |
|
Tomatovillian

Join Date: Mar 2009
Location: Tucson
Posts: 659
|
Ray I have a question about the clearx, how and when do you use it? And can you use it when the plants are in the container?
|
|
|
|
|
February 14, 2012
|
#105 |
|
Tomatovillian

Join Date: Apr 2011
Location: Baton Rouge,Louisiana Zone 8b
Posts: 340
|
Ray, I liked how you extended your cages by flipping one over and securing it to the top of the shelving.
__________________
Rob |
|
|
|
 |
|
|


 View Public Profile
 Find More Posts by rnewste
 Linear Mode

